- TOSIZE.ie
- Do it yourself
- DIY Projects
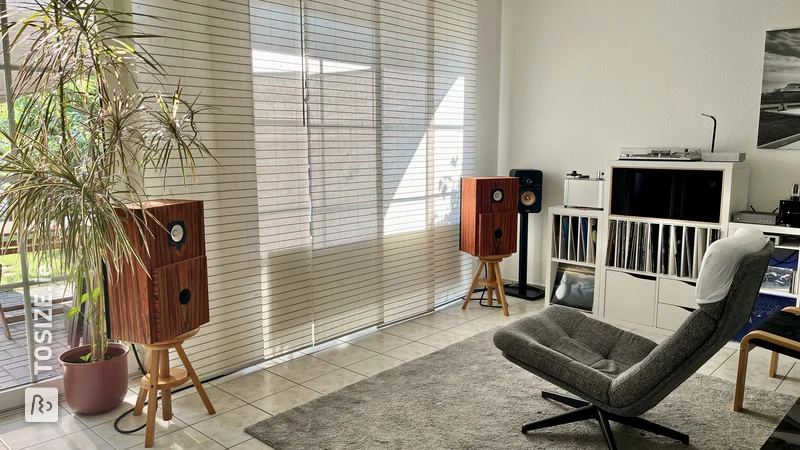
Le Petit, a loudspeaker from the 80s, by Simon
Le Petit, a loudspeaker from the 80s, by Simon

Create this project yourself with sheet material cut to size by TOSIZE.ie!
Simon
Average
3 minutes
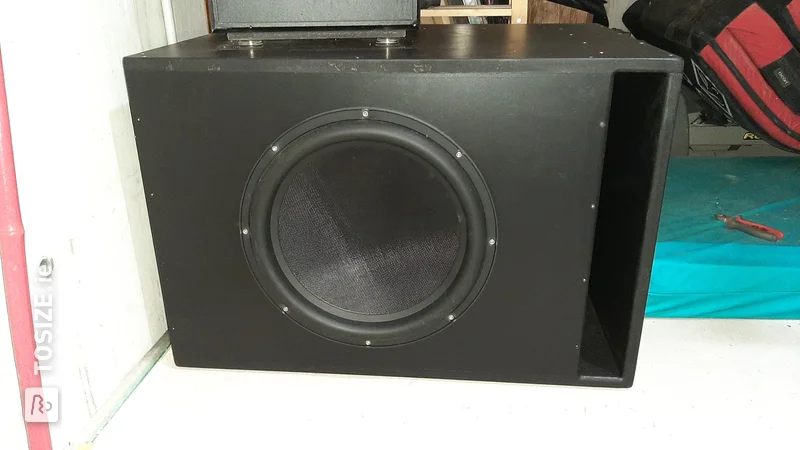
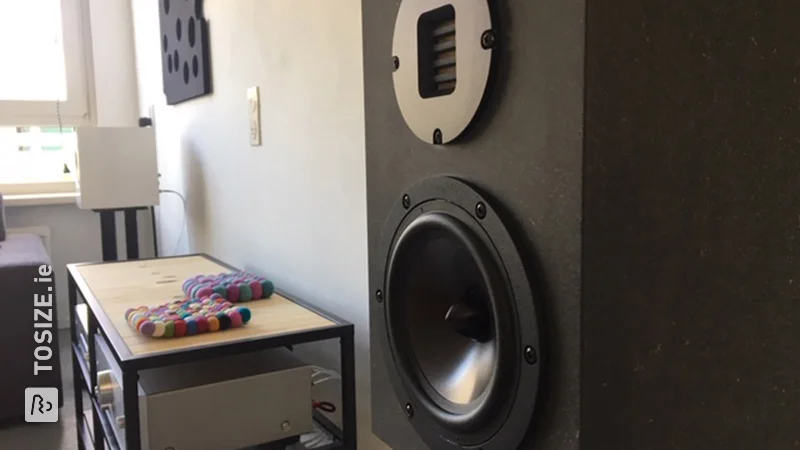
In this project, Simon explains how he started making custom French hi-fi club speakers himself. Among other things, from sawn MDF 25mm and he made a beautiful speaker for relatively little money.
Description by Simon
The concept comes from a French hi-fi "club" and was released in 1984. A friend of mine who is interested in hi-fi recommended these speakers to me. After doing some research, I decided to build it myself. For the price of around €350, there are hardly any speakers that are as good as this one.
How I did this project
First, I had to extract all the information on how to build the speaker from the construction plan written in French and do a few calculations.Then I ordered all the necessary parts online.These were:- The chassis (Fostex FE103NV)- The 25mm thick MDF wood- Bass reflex tubes- Pole terminals- Needle felt, as well as screws, nails and wood glue.When all the materials had arrived, we first used an 86mm hole saw to cut holes for the chassis in the front panel.Then we used a 74mm hole saw to cut holes for the bass reflex tubes.We then had to drill the holes for the chassis a few mm more, as they didn't quite fit in.Next we made the side panels, Top and bottom panels and the front panels were glued together with quick-drying glue and then weighted down with bricks. Then holes were drilled in the rear panels to screw in the pole terminals. We also soldered 2.5mm copper cables to the chassis connections. After the glue was dry, we continued working on the housing. We drilled a total of 10 holes in the sides, top and bottom panels and then inserted 8mm concrete dowels so that the rear panel could be easily screwed in and out later. We then cut the needle felt with a cutter knife and glued it to all sides on the inside. Now we have glued a second, smaller front panel with a hole in it in front of the hole for the bass reflex tube. This changes the sound. Then we screwed the chassis into the housing and soldered the cables to the pole terminals on the inside. Finally, we screwed the rear panel on with 5mm wood screws. Unfortunately, the large screws with the dowels exerted too much force on the wood in two places, causing a slight crack. So we unscrewed the screws again and used 4mm screws. Then we put some wood glue in the crack and clamped the walls with a screw clamp. After about an hour we loosened the clamp again and everything looked great again.
Dimensions of my DIY project
H: 54.6cm
W: 35.2cm
D: 25.2cm
Tip! Also check out our handy DIY tips!
What now?
Want to make this DIY project? Check out Simon's saw list and complete your order easily.
€ 127,76
All materials used
View all sheet materials